You can manage your media files (images, videos, documents and podcasts) via Release→ Publish in the left-hand menu. Each media type has its own tab with specific management options.
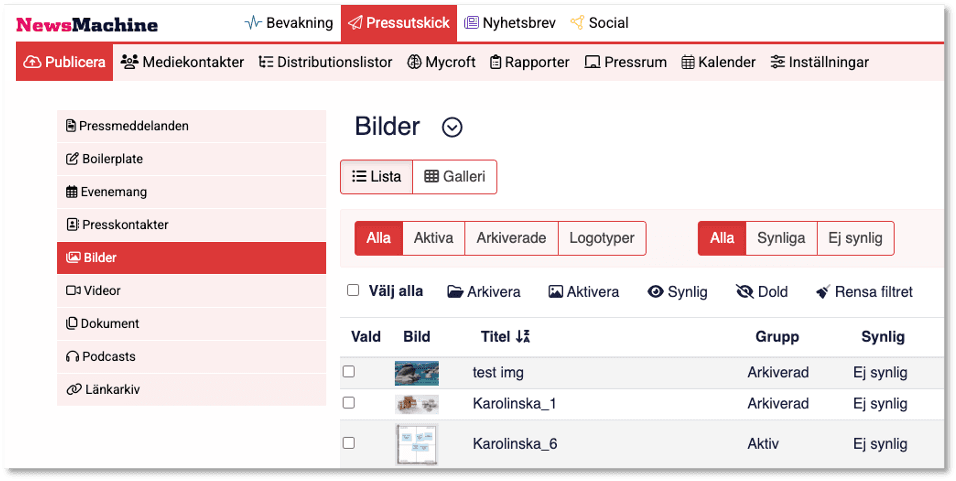
View options: List or Gallery
At the top of the page, you’ll see two buttons:
- List – displays items in a table format.
- Gallery – displays items as thumbnails.
Choose the viewing mode that best suits your workflow.
Uploading new objects
In the top right corner, click on the ‘Upload new’ button to add new images, videos, documents or podcasts. These can then be used in your press releases or displayed in your Press Room.
Filtering option

Use the filters at the top of the media list to quickly sort and find specific items:
- Active / Archived / Logos – shows only active, archived or logo objects.
- Visible / Hidden – shows items that are visible or hidden in the Press Room.
- All – resets the view to show all items.
- Clear the filter – resets all filters to default settings.
You can also use the search bar to find a specific item by name.
Managing items

Below the filters, you’ll find several batch action options:
- Select all
- Archive – hides items from dropdowns when creating press releases.
- Activate – makes archived items available again.
- Visible – displays selected items in the Pressroom Media Archive.
- Hidden – hides items from the Press Room media archive.
Note! Archiving items helps keep your dropdowns clean and speeds up loading times when managing press releases.
View deleted items
To view deleted media items, check the “Show deleted” checkbox.
To restore a deleted item, click on the slashed trash can icon.
Each item has a set of quick actions under the “Actions” section:
- Download
- Edit
- Archive
- Delete